

Mastering the V60: A Step-by-Step Guide to Brewing Perfect Coffee

Updated: Sep 20
My simple starting recipe for almost every filter coffee we roast — plus what to change when your V60 tastes sour, bitter, weak or just a bit disappointing.
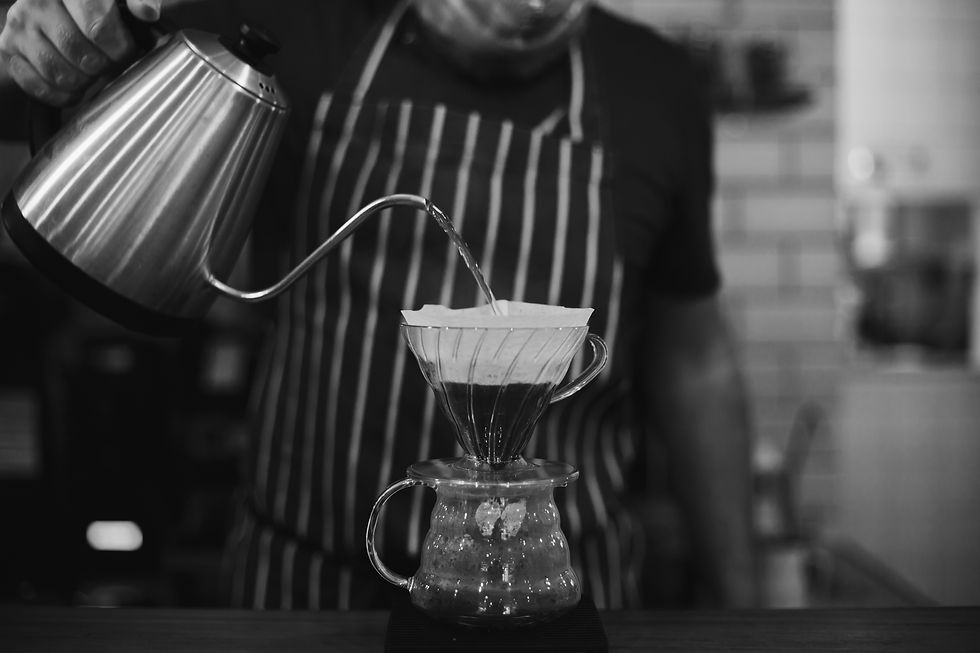
The V60 is still probably my favourite way to make coffee.
Not because it's particularly clever.
Actually, the opposite.
A plastic V60 costs less than a lot of bags of specialty coffee. Add a paper filter, grinder, kettle and some scales and you can make an exceptionally good cup of coffee.
Yes, I have a gooseneck kettle at home.
No, you don't need one.
I've even had a customer show me how he pours water over the grounds using a spoon and a completely normal kettle.
It worked.
Coffee people have an impressive ability to make simple things unnecessarily complicated.
So let's try not to do that.
This is the basic V60 recipe I use as my starting point whenever I'm trying a new coffee.
☕ Here's my quick V60 base recipe
If you just want the recipe and don't particularly care what I have to say about it, here you go:
Coffee: 13.3g
Water: 200g
Ratio: 1:15
Water temperature: 91–93°C
Grind: Medium to medium-coarse
Bloom: Around 45 seconds
Total brew time: Roughly 2:30–3:30
And the two most useful things to remember:
Running too fast? → Grind finer.
Running too slowly? → Grind coarser.
That's basically it.
Everything else is adjustment.
Why 1:15?
I normally start my V60 at a 1:15 coffee-to-water ratio.
That means for every gram of coffee, I use 15 grams of water.
So:
10g coffee → 150g water
13.3g coffee → 200g water
20g coffee → 300g water
Is 1:15 the perfect V60 ratio?
No.
There isn't one.
It's simply a ratio that seems to work very well for a lot of the coffees we roast, which makes it a useful place to start.
If I brew a coffee at 1:15 and it tastes great, fantastic.
If it doesn't, I change something.
Coffee recipes are starting points, not commandments.
What equipment do you actually need?
You don't need very much.
A V60
I use the plastic version.
It's cheap, difficult to break and works extremely well.
There are prettier versions made from ceramic, glass and metal if you want them.
I still use the plastic one.
V60 paper filters
Fairly essential unless you enjoy coffee grounds in your mouth.
A grinder
Ideally, grind your coffee immediately before brewing.
At home I use a Baratza Encore ESP, which does the job perfectly well.
You absolutely do not need the same grinder.
Scales
These I do think are important.
Not because weighing coffee makes you more professional, but because it makes your coffee repeatable.
If today's coffee tastes fantastic and you know you used 13.3g coffee and 200g water, you can make it again tomorrow.
Without scales, you're mostly relying on luck and spoon sizes.
A kettle
A gooseneck kettle gives you more control over your pouring.
It's nice to have.
It is not compulsory.
A normal kettle works.
Step 1: Rinse the paper filter
Put the filter into the V60 and rinse it with hot water.
This removes any possible papery taste and also warms up the brewer and cup.
At least, that's the official explanation.
If I'm being completely truthful, I have occasionally forgotten to rinse the paper and haven't noticed some catastrophic difference in the final coffee.
But it takes about five seconds.
So I still do it.
Once you've rinsed the filter, throw away the water.
Step 2: Grind your coffee
For this recipe we're using:
13.3g coffee
Grind somewhere around medium to medium-coarse.
Unfortunately, describing grind size in words is a bit useless.
One grinder's “medium” is another grinder's “quite fine”, and telling you it should look like sand doesn't help much either because beaches also contain different-sized sand.
So don't worry too much about getting it perfect before you've even started.
Pick a sensible starting point.
Brew the coffee.
Taste it.
Then adjust.
That's how you find the correct grind size for your grinder and your coffee.
Step 3: Add the coffee and make a little hole
Put your ground coffee into the rinsed filter.
Give the V60 a small shake to level the coffee bed.
I then like to make a little indentation in the middle of the grounds.
Nothing dramatic.
We're not digging for treasure.
It just helps the first water reach the coffee evenly.
Now put everything on the scales and tare them back to zero.
Step 4: Bloom the coffee
Start your timer.
Pour around 40–50g of water over the coffee.
Try to wet all the grounds.
Then wait until around 45 seconds.
You'll probably see bubbles appearing from the coffee.
This is CO₂ escaping.
Freshly roasted coffee contains quite a lot of trapped gas, and the bloom gives some of that gas a chance to escape before we continue brewing.
Very fresh coffee can bubble quite dramatically.
Older coffee might barely move.
Don't panic either way.
We're making coffee, not judging a volcano.
Step 5: Continue pouring
After the bloom, start adding the rest of your water.
I like to pour slowly and steadily, working around the coffee bed rather than attacking one spot in the middle.
You don't need to perform an elaborate pouring dance.
Just try to keep things reasonably controlled.
Continue until your scales show:
200g
Then let the water drain through the coffee.
How long should a V60 take?
For this recipe, somewhere around 2 minutes 30 seconds to 3 minutes 30 seconds is a useful starting range.
Notice I said useful starting range.
Not law.
If your V60 finishes at 2:20 and tastes fantastic, please don't ruin it by grinding finer just because somebody on the internet told you coffee should take three minutes.
The stopwatch is there to help diagnose what's happening.
Your tongue still gets the final vote.
🏎️ My V60 runs too fast
Let's say all 200g of water has disappeared through your coffee in 1 minute 40 seconds.
Start by grinding finer.
A finer grind creates more resistance and generally increases extraction.
Make a small adjustment.
Brew again.
Taste it.
Don't immediately start changing the temperature, ratio, coffee dose and pouring technique as well.
Otherwise, if the next cup tastes amazing, you won't know what fixed it.
🐌 My V60 takes forever
If you're still standing there staring at dripping coffee after five minutes, try grinding coarser.
Again, make a small adjustment.
You're looking for the point where the coffee flows nicely and, more importantly, tastes good.
😖 My V60 tastes sour
If the coffee tastes unpleasantly sour, sharp or thin, you may not be extracting enough from it.
Start by grinding slightly finer.
That increases the surface area of the coffee and generally allows us to extract more.
You could also experiment with slightly hotter water, particularly with a lighter roast.
But don't do both at once.
Change the grind.
Taste.
Then decide what to do next.
And remember that acidity isn't automatically a fault.
Some coffees are naturally bright and fruity.
A good Ethiopian coffee might have plenty of citrus or berry-like acidity.
That's very different from a badly under-extracted cup that tastes aggressively sour.
😬 My V60 tastes bitter or dry
Go the other way.
Try grinding slightly coarser.
You may be extracting more than you want from the coffee.
If that doesn't solve it, you can also experiment with slightly cooler water.
Again:
One change at a time.
This is probably the most useful brewing advice I can give you.
💦 My V60 tastes weak
Weak coffee is slightly more complicated.
Weak doesn't necessarily mean under-extracted.
It might simply mean you've used too much water relative to the amount of coffee.
If you're using our 1:15 recipe and still find it too light, try increasing the dose slightly.
For example:
Instead of:
13.3g coffee → 200g water
try:
14g coffee → 200g water
Small changes can make a surprising difference.
What temperature should you use?
I normally start somewhere around 91–93°C.
But, again, it depends on the coffee.
Lighter roasted coffees can sometimes benefit from hotter water.
Darker coffees might taste better slightly cooler.
You don't necessarily need a temperature-controlled kettle either.
If your kettle doesn't show temperature, boil the water and give it a little time before brewing.
Please don't let the absence of a €150 kettle stop you from making coffee.
Do I really need a gooseneck kettle?
No.
There. I've said it.
A gooseneck kettle is very useful because it gives you much better control over the speed and placement of the water.
I like mine.
But you can absolutely make good V60 with a normal kettle.
I've seen people use spoons, measuring jugs and all sorts of creative methods to control the water.
Would I choose them over a gooseneck?
Probably not.
Would I rather you buy better coffee than an unnecessarily expensive kettle?
Yes.
Let your V60 cool down
This is important.
Don't drink the whole thing immediately.
Taste it when it's hot.
Then again when it's warm.
And leave a little bit until it's surprisingly cool.
Coffee changes enormously with temperature.
When it's very hot, it can actually be difficult to taste some of the more subtle flavours.
As it cools, sweetness, acidity and individual flavours often become much easier to recognise.
A coffee that seems fairly simple when it's hot might suddenly start tasting much fruitier ten minutes later.
And I stand my ground on this:
Only good coffee will taste good when cold.
Which coffee is best for V60?
Technically?
Whatever coffee you enjoy.
Personally, this is where I really like some of our more interesting single origins.
Fruity, floral and complex coffees often work beautifully in a V60 because the paper filter gives you a very clean cup and allows those flavours to come through clearly.
But don't let anyone tell you filter coffee has to taste like jasmine and passion fruit.
If you like chocolatey Brazilian coffee, brew chocolatey Brazilian coffee.
If you like bright Ethiopian coffee, brew that.
The best coffee for your V60 is the coffee you actually enjoy drinking.
An occasionally controversial idea in specialty coffee.
My V60 rules
After all of that, my rules are actually quite simple.
Start around 1:15.
Use freshly ground coffee if you can.
If it runs too fast, grind finer.
If it runs too slowly, grind coarser.
Change one thing at a time.
Let the coffee cool down before deciding whether you like it.
And most importantly:
Taste the coffee instead of chasing the recipe.
The numbers help you understand what you're doing.
They don't decide whether your coffee tastes good.
You do.
So start with:
13.3g coffee.
200g water.
91–93°C.
45-second bloom.
Then see where the coffee takes you.
That's the fun part.
— Henning Al-Gharb Coffee Roasters, Algarve
☕ Want to make better coffee at home?
Join The Friday Filter.
One useful coffee tip every Friday from the Al-Gharb Coffee Roasters.
Brewing advice, coffee experiments, things we've learned from roasting—and occasionally things we've learned by getting it completely wrong.
No coffee snobbery. Just better coffee.


_edited_edited.png)


Comments